Sometimes life just wears you down. Beer helps, but it doesn’t help you get any of that time back. Here’s a quick summary of my beer-related life over the summer:
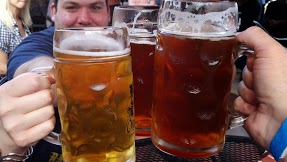
June 15-23 – Vacation to California, where we traveled to San Francisco and Los Angeles. It was the first time I have had any Russian River beers, and I see why they score so high. I tried the gambit of the specials, like
- Pliny the Elder
- Damnation
- Supplication
- Consecration
- Redemption
July 4th weekend – brewed several beers, including two sours: a Tart of Darkness clone, and an Oud Bruin, both of which turned out great (they were put in bottles a few weeks ago)
July 11 – Had a Monk’s Cafe Flemish Red at Monk’s Cafe in Philadelphia. Need I say more?
September 4 – Enjoyed Sweet Baby Jesus from DuClaw Brewing for the first time in Washington D.C. – A peanut butter porter. It was pretty tasty.
September 28 – Iowa City’s Northside Oktoberfest – the event was rainy, so there wasn’t a lot of room for everyone under the tent. New rules put in place by the state made the event less fun. The biggest issue with this year’s event was the 1 oz samples for several of the premium beers were 5 or 6 tickets (at 50 cents per ticket). Does this mean that the entire 20 ounce bottle is worth $50? No, it isn’t, so I would appreciate equalizing the ticket per sample price to be more reasonable based on the bottle price.
October 4 – Oktoberfest at Millstream Brewing – delicious beer at a cool place.
October 15 – Hit up a place in Santa Monica (West 4th and Jane) that earned me a Founder’s Badge on untappd. Maybe not cool for you, but it was for me.
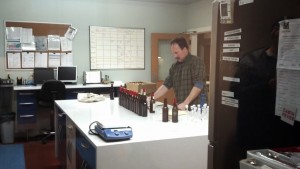
November 16 – Took the 3 hour trek with a couple friends to New Glarus Brewing in Wisconsin. We took the “tour”, and had the guide explain a bit more about the brewery. The coolest part of the trip was we saw Dan Carey, the brewmaster, sipping on several different Thumbprint series beers in the QA Lab. He waved at our group (since they were like fish in a fishbowl), and just a small part of me wanted him to step out for a photo op. We creepily stalked him for a while before we packed up our beer and left.
And, pretty much the whole fall we tailgated with the crew, the Keg Totem at each home game.
Oh, and remember the Brew-B-Q? We plan on having some of the barleywine we brewed at our upcoming holiday party. It ended up being 12%, and has been aging since then.
How was your summer? Any great stories to tell? Let me know!


